Showing posts with label tutorial. Show all posts

Monday, March 7, 2011

Make It Monday! Magnetic Post It Holder


My life depends on post it notes...literally.  You have to understand I have the attention span of a knat.  If I don't write things down as soon as I think of them...swoosh...it's gone.  Post it notes, help me keep it all going.  I have them stuck every where, the kitchen, bed room,  by the puter.  I've even been known to have one or two attached to the bathroom mirror.  I've made a bunch of these little post it holders for myself, family, friends.  They're handy and pretty darn cute.  So, here you go...

Supplies:

4x4 chipboard square coaster blank ( or you can use a 4x4 square of heavy cardboard)
1 piece of patterned scrapbook paper
double stick tape
1 clip
1 post it pad
tacky glue
magnet


Lay your chipboard blank on to the plain side of your patterned paper.  Trace around and cut out.  Cover your chipboard with double stick tape. 


Carefully line up your patterened paper piece as evenly as you can and press so that your pattern paper covers your chipboard.


To cover your clip, cut out a piece of pattern paper 1 inch x 1 1/2 inches. 


Cover all 3 sides of your clip with double stick tape.  Carefully, line one edge of your paper to the bottom edge of your clip. Press firmly.  Keep pressing firmly fitting the paper around the top of the clip snuggly.  Lastly, wrap the final side of the clip and press.  Trim if necessary.


Flip your chipboard over to the plain side and glue a magnet.  Wait until glue dries completely before using. 


Place your clip at the top, center of your board, open and slip a post it pad underneath.  Now, you are prepared if you suddenly develop swiss cheese brain syndrome; a condition I've suffered from for years. Don't worry, it's not fatal...just sad.  Happy Crafting!

Monday, February 28, 2011

Make it Monday! Paper Spring Flower Garland


I've got Spring fever soooo bad this year.  Usually, I love the cold weather, but this year winter has been rough.  I'll be happy to see it go.  I'm looking forward to blue skies, bird singing, getting out in the garden, and planting my flowers.  For now though, with winter hanging around for a few more weeks, at least, I decided to bring a bit of spring indoors with paper flowers.  Not as good as the real thing, but a close second.

For this project you will need:

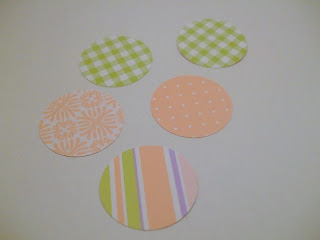
3 coordinating sheets of patterned cardstock
punches: 2 inch scallop, 1 1/2 circle and 1 inch circle (Or draw your own scallop shape and find something to trace that is 1 1/2 and a 1 inch circle)
glue or double stick tape
ribbon, string or yarn that matches your paper
small hole, hole punch

First step is to determine how long your garland needs to be.  If you're using a 2 inch punch, and you want a garland that is 2 feet long (24 inches), then you will need to punch 12 scallop shapes, 12 -  1 1/2 circles, and 12 - 1 inch circles.  Cut a few from each sheet, so that you have a nice pattern variety.


Lay out your "flowers" and put a 1 1/2 inch circle on top of it in the middle. Then a 1 inch circle on top of that.  The result is a three layer flower. Continue down the line and vary your pattens so that you get a nice mix, each flower should have a different patterned scallop, 1 1/2 circle and 1 inch circle.


Once you have them like you want them, use the glue or double stick tape to stick the 1 1/2 inch circle to the scallop and then the 1 inch circle to the 1 1/2 inch circle.

If using glue, allow to dry before continuing with the next step.

Take each flower and punch a hole on one side, then across from it on the other side.  Repeat with all the flowers.


Cut your ribbon, string or yarn ( I used some white chenille yarn that I had laying around).  Cut into 2 1/2 inch lengths.  Cut a little longer if you plan on connecting the flowers with bows instead of knots.

Slip one end through the second hole on your first flower, and through the first hole on your second flower.  Tie slowly until you get the distance between the two that you want (mine were almost touching), then tie your knot or bow.  Continue with the rest until they are all tied together in a row.


Cut two pieces of ribbon, string or yarn, about 6 inches long. Take one piece and match your cut ends.  Slip both through the first hole on your first flower about half way through. 


Slip the open ends back through the loop that the string made and pull. 


Knot the ends together.  Repeat with the last hole of your garland.


Now the hardest part...trying to figure out where to hang it.  These look so cute hung from mantles, strung along a curtain rod or along a head board.  You can change the theme of these to fit any season.  Use black, orange and purple for halloween; Green, red and white for Christmas; Red, white and blue for 4th of July or even pastel colors for a baby shower.